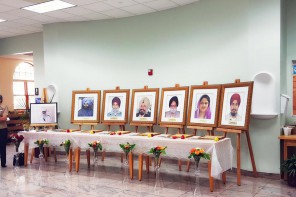
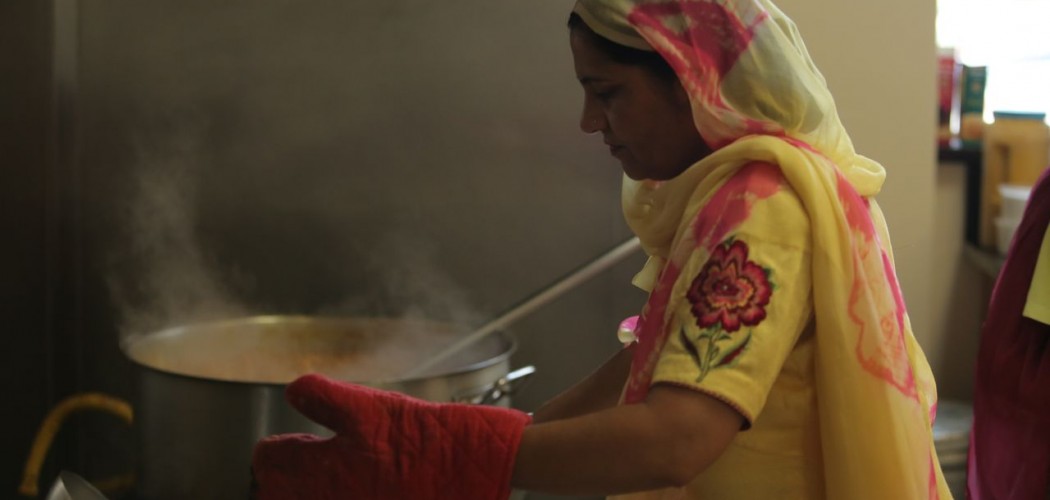
The cooks behind the Sikh Temple of Wisconsin share some of their favorite recipes used for langar, the temple’s community meal, with “Off the Menu.”
In terms of langar food, there are many recipes and methods of cooking food but some key points are:
- All food should be prepared at the Gurdwara (Temple) and blessed with prayers.
- All food must be vegetarian (no meat, fish, or eggs)
- Langar should be served to all regardless or race, religion, class, or gender.
Prashad or Karah Prashad
It literally means “gracious gift. This is our sacred offering to the congregation as it is blessed with prayers while and after it is made. It is equivalent to what Catholics may take as wine and bread. It is made using butter, flour, sugar, and water – 4 essentials that a common man can afford. The offering must be served with and received with hands only, and the person receiving must be sitting or low on the ground humbly receiving the offering with two hands. Both the person giving and receiving the offering should be appropriately dress with their heads covered and not footwear (except socks).
Ingredients:
(Equal parts butter, flour, and sugar)
1 cup ghee or unsalted butter
1 cup whole grain flour (atta)
1 cup sugar
3 cups water
About 20 servings, each serving is about 1 handful
1. Measure all ingredients.
2. Add sugar to water and set in pot to boil.
3. Melt ghee unsalted butter in a pan.
4. To clarify unsalted butter, heat and skim off foamy curds and spoon out solids from bottom of pan.
5. Add whole grain flour (atta) to melted butter.
6. Stir mixture continuously to lightly toast flour.
7. Continue stirring flour and butter mixture while sugar boils to make light syrup. Butter separates from toasted flour turning a deep golden color with a nutty aroma.
8. Pour boiling sugar syrup into toasted flour and butter mixture. Mixture will sputter. Take care not to be scalded. Stir rapidly until all water is absorbed.
9. Keep stirring prashad as it thickens into a firm pudding.
10. Completely cooked prashad slides easily from pan into a steel bowl or iron bowl.
11. Bless the prashad with ardas. Touch cooled prashad with a kirpan (sacred dagger) at the appropriate time during ardas (prayer blessing).
12. Distribute the prashad to the congregation
Parshad after it is made: Kirpan (sacred dagger) cutting through and finishing the blessing after the ardas (blessing prayer) is complete.
Samosas
Samosas are one of the most widely loved appetizers at Gurdwaras and have grown to be known as delicious potato snacks in the Western world. Because samosas are appetizers, they are usually not blessed as they are served in the morning of the service. Therefore, there are not many restrictions because samosas are a snack item. Samosas are not only common in Gurdwaras but also at Indian restaurants. Because samosas are so popular they are made in very large quantities, around 500 or so depending on the expected congregation. So when making samosas shortcuts are used by using readymade items such as tortillas, rather than making dough from scratch
Ingredients:
10″ white flour tortillas
potatoes
peas
white flour
water
Spices – varies
deep frying oil (canola oil)
- First cut and skin the potatoes
- Cook the potatoes and peas along with the desired spices into a stuffing
- Use a white flour and a little water to create a flour paste, like glue
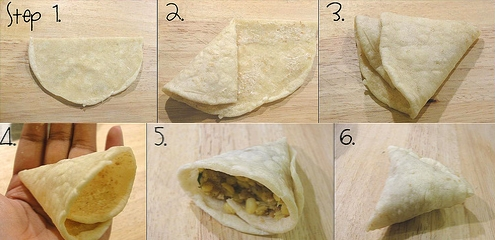
- Heat the tortillas and cut them in half creating two semicircles of each tortilla
- Take one semicircle and overlap the edges to make a cone cup, use the white flour paste to seal the overlap edges and push the edges together to make the cone cup shape hold
- Take the stuffing and fill the tortilla cone about 2/3
- Use the white flour paste and seal the cone shut making it into a round triangle
- Do this until you have prepared the desired amount
- Store the uncooked samosas in the refrigerator until the morning of the service
- On the day of the service deep fry the samosas to a golden brown and they are ready to serve
- Samosas are good served with tamarind chutney (sauce), mint chutney (sauce), or even ketchup
Roti

Roti his is the main grain staple of Indians, especially Punjabis, people from the state of Punjab where the most farming of grains in India is harvested. Roti along with other main course meals are
To make Roti from scratch, prepare flour dough:
2 cups flour
1 cup water
1-2 Tbs oil (*optional)
Serves: 4-6 people (12 Rotis)
*Oil is usually used when making large batches of Roti and helps them to stay tender until they are consumed.
- Knead the flour, water, and oil into a smooth play-dough like substance
- take half handful amounts from the dough and shape it into a round saucer with your palms, known as perras
- Then flatten out the perra from the center out using your thumbs and making into a thick pancake like shape
- then use a rolling pin to flatten out the dough into a thin tortilla like shape
- Then shape out the roti by flipping it back and forth from one hand to the other and place on a heat griddle or heavy frying pan on medium high
- Parts of the roti may puff allowing it to cook more evenly and quicker
- Flip the roti about ever 15-25 seconds, parts of the roti may be toasted, but as long as it’s not scorched it is still good
- Make sure it is fully cooked before removing it from the stove
- After removing the roti, it is slightly buttered from one or both sides to keep it fresh
- Rotis that were part of the blessing ceremony are then mixed with the rest of the hundreds of rotis ready to be served, hence blessing all the rotis
Poori
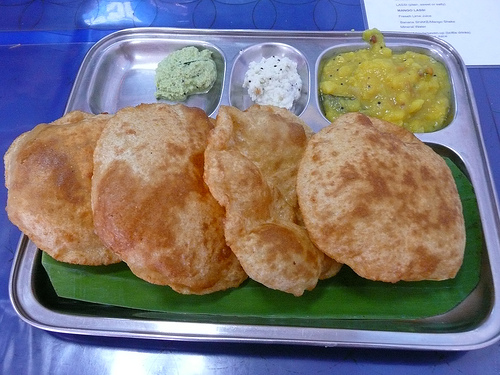
Poori is very similar to rotis but it is made with white flour and fried rather than baked on a stove
-To make poori from scratch, prepare flour dough:
2 cups white flour
1 cup water
1-2 Tbs oil (*optional)
Deep Frying Oil (Canola Oil)
Serves: 4-6 people (12 Rotis)
*Oil is usually used when making large batches of Roti and helps them to stay tender until they are consumed.
- Knead the flour, water, and oil into a smooth play-dough like substance
- take half handful amounts from the dough and shape it into a round saucer with your palms, known as perras
- Then flatten out the perra from the center out using your thumbs and making into a thick pancake like shape
- then use a rolling pin to flatten out the dough into a thin tortilla like shape
- Then shape out the poori and place into the deep frying oil
- Fry until a golden brown
- Make sure it is fully cooked before removing it
Pooris also that were part of the blessing ceremony are then mixed with the rest of the hundreds of rotis ready to be served, hence blessing all the rotis.
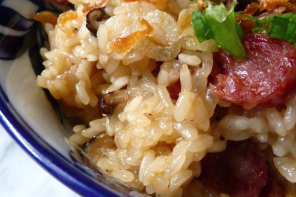
Punjabi Chole or Chana Masala
- Wash and soak the chole (chickpeas) in enough water overnight. Add enough amount of water as the chickpeas increase in size after soaking it. Rinse the soaked chickpeas in water.
- To give a dark color to the chana, traditionally dried amla (indian gooseberries) are added. These also give a faint sourness to the stock. If you do not have dried amla, then add 1 black tea bag. You can also just cook the chickpeas with salt and water.
- In a pressure cooker add the chole along with the 2 to 3 dried amla pieces or a tea bag. Taj tea bags work very well. Then pour water.
- Season with salt. Stir very well.
- Pressure cook the chana for 18 to 20 whistles. The chana should be cooked well and softened. The chole should be soft when you mash it with a spoon. The chana should not give you a bite when you eat it. If you do not have a pressure cooker, then cook the chickpeas in a pot with plenty of water.
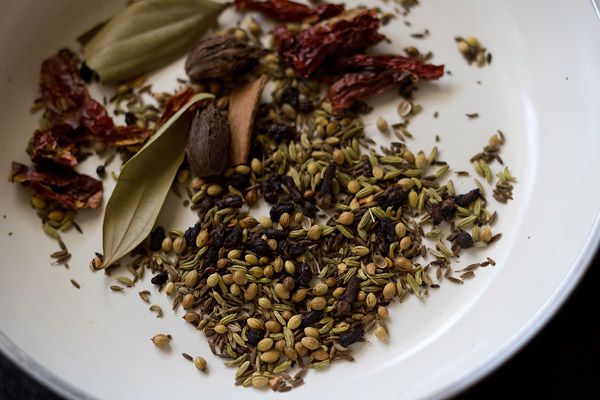
- Meanwhile, in a pan, take all the whole spices for the chole masala and on a low heat begin to roast them.
- Stir often and roast the spices till they get extra browned. You have to go beyond a point roasting them, even after they become fragrant and they get more browned than what is the norm usually.
- Let theses roasted spices cool and then grind them finely in a coffee grinder or in a dry grinder.
- By now the chana is cooked. You will see a darker brown shade in the safed (white chana) or chickpeas. Remove the amla pieces which would have softened by now or the tea bag from the stock.
- Heat oil in a pan or kadai. Add ginger-garlic paste and saute till their raw aroma goes away.
- Then add chopped onions and saute till the onions turn translucent or light brown.
- Add finely chopped tomatoes.
- Saute the tomatoes till they soften and the oil starts to leave the sides of the masala.
- Then add the powdered spices that we made, along with red chili powder & turmeric powder.
- Stir well. Then add slit green chilies to the onion-ginger-tomato mixture.
- Add the cooked & drained chole. Reserve the stock.
- Season with salt. Stir. Keep the addition of salt in check as salt is also there in the stock.
- Add about 1 to 1.25 cups of the reserved stock or water. Stir well.
- Cover the chole masala. Simmer on a low to medium flame. You can also cook without the lid. The gravy will thicken and reduce. Mash a few chana. This will help thicken the gravy. You can keep the consistency you prefer.
- In case, you have not added dry pomegranate seeds while roasting the spices, then you need to add amchur powder (dry mango powder) now. About 1 tsp amchur powder is enough. However, you can add less or more of it as per your taste. Stir very well.
- The chana masala ready to be served.
- Garnish punjabi chole asala with chopped onions and coriander leaves. Serve the punjabi chole with kulcha, bhaturas, aloo bhatura, poori, naan, along with sliced onions and lime. Chole also tastes good with plain rice or jeera rice.